
Table of Contents
- Signs of Poor Yard Drainage You Shouldn’t Ignore
- Assess Your Yard’s Drainage Before Starting
- Step 1: Identify Where Water Pools and Flows
- Step 2: How to Regrade Your Yard for Better Water Flow
- Step 3: Install a French Drain to Stop Standing Water
- Step 4: Extend Downspouts Away From Your Foundation
- Step 5: Core Aerate and Add Organic Matter to Improve Soil
- Step 6: Create a Swale or Rain Garden for Surface Drainage
- Frequently Asked Questions
Last Updated: September 28, 2026
Signs of Poor Yard Drainage You Shouldn’t Ignore
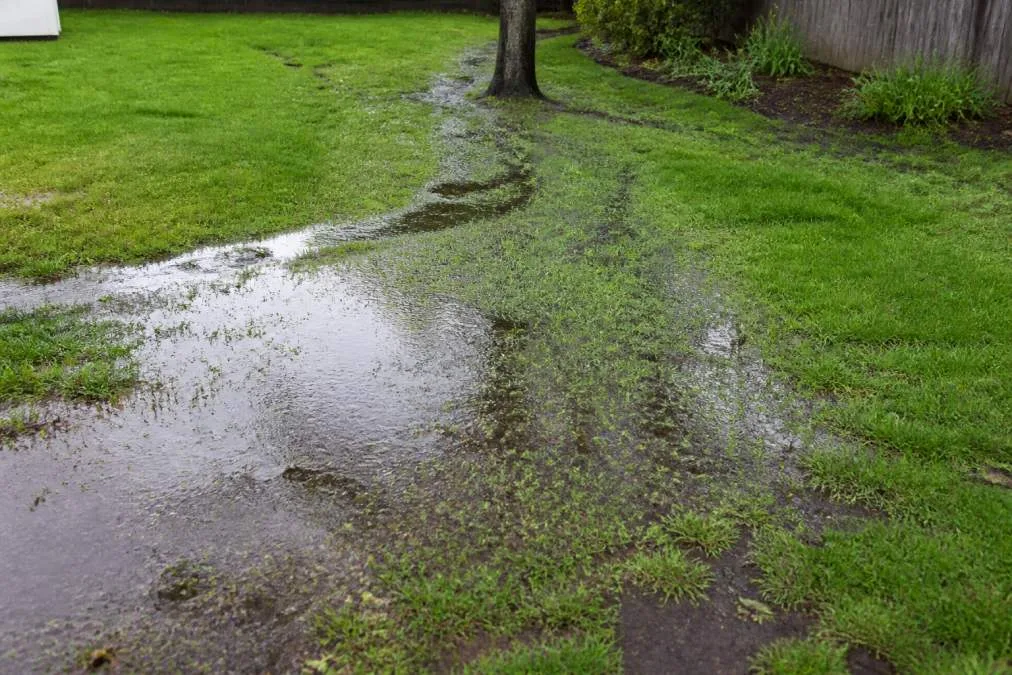
Standing water that lingers for hours after rain signals a drainage problem that worsens over time without intervention.
The most common drainage problems in residential yards include:
- Pooling water in low spots that stays for days
- Soggy patches that kill grass and invite mosquitoes
- Foundation cracks from water pressure against basement walls
- Eroded soil washing away during heavy rain
- Dead plants and trees struggling in waterlogged soil
- Basement flooding or seepage during storms
- Compacted soil that repels water instead of absorbing it
Small drainage problems become major repair bills within a season or two. The good news? You can fix backyard drainage issues before they damage your property.
Assess Your Yard’s Drainage Before Starting
Every yard drains differently based on soil type, slope, and existing infrastructure.
Walk your property after rain and observe where water pools and flows for several rain events.
Check your soil type with a simple test: dig a hole six inches deep, fill it with water, and time drainage. Fast drainage (under an hour) indicates sandy soil; slow drainage (several hours) indicates clay. Clay-heavy yards need more aggressive drainage solutions.
Your yard should slope away from your house at least six inches over ten feet. If ground slopes toward your foundation, water flows to your basement.
Step 1: Identify Where Water Pools and Flows
Mark pooling spots with stakes, spray paint, or flags. During the next rain, observe whether water flows toward your house or away and whether it pools in the same spots.
Look for darker grass or dead patches where water stands too long, these are your problem zones.
Follow downspouts to see where they discharge. Many homes dump roof water directly into the yard near the foundation, concentrating water in one spot.
Take photos and sketch a map showing where water pools and flows. This becomes your action plan for choosing drainage solutions.
Step 2: How to Regrade Your Yard for Better Water Flow
Regrading is often the cheapest and most effective first step to fix backyard drainage issues.
Make water flow away from your house toward natural drainage areas or streets with proper grading sloping at least six inches over ten feet.
Ground should be highest at your foundation and slope downward. Fill any low spots between your house and property line.
Add topsoil gradually, compacting as you go. Build up low spots in stages, watering and letting soil settle between additions to prevent settling and washout.
Focus on areas within ten feet of your foundation first, where water causes the most damage.
Check Local Codes and HOA Rules Before You Start
Regrading can violate local ordinances or HOA rules, creating expensive problems if ignored.
Local grading ordinances. Many municipalities regulate how steeply you can grade and where water must flow. Some jurisdictions require that water drain toward the street or a designated storm drain system, not toward a neighbor’s property. If you regrade and direct water onto a neighbor’s land, they can sue you for property damage. The legal term is “altered drainage,” and it’s taken seriously.
Before regrading, contact your local building department to ask about grading ordinances, required drainage direction, permits, and setback requirements.
Some areas require a grading plan or drainage easement, especially if directing water toward public storm drains or in flood zones.
HOA restrictions. HOAs often have rules about grading changes. Some prohibit regrading without written approval or require grading to match a community master plan.
Violating HOA rules can result in fines ($50-$500 per month) or restoration requirements. Check your HOA bylaws before regrading.
Neighbor disputes. Regrading that sends water toward a neighbor’s property can trigger legal conflict. Document the original drainage pattern with photos before regrading to protect yourself.
The Right Way to Regrade Without Legal Risk
Regrading takes labor but minimal materials and can solve many drainage problems without the cost of installing drains.
- Get written HOA approval (if applicable) with a sketch of current and proposed grades.
- Confirm local ordinances allow it with a call to your building department.
- Direct water toward the street or designated drainage area, not toward neighbors’ property.
- Keep before and after photos and material receipts for documentation.
Step 3: Install a French Drain to Stop Standing Water
A French drain is a gravel-filled trench with perforated pipe that captures and moves water underground, working for persistent wet spots regrading won’t fix.
Dig a trench two feet deep and one foot wide, sloping slightly downward toward the street, catch basin, or rain garden.
Line the trench with landscape fabric. This prevents soil from clogging the gravel. Add four inches of gravel at the bottom. Place perforated pipe on top of the gravel. The pipe should have holes facing downward. Cover the pipe with more gravel, then fold the fabric over the top.
Cap it with topsoil and grass seed or sod. A properly installed French drain is invisible once it’s done.
Why French Drains Fail (and How to Prevent It)
Most homeowners install a French drain and assume it will work forever. That’s where problems start. French drains fail when:
- Soil clogs the perforations. Even with landscape fabric, fine soil particles migrate into the pipe over time, especially in clay-heavy yards. This reduces water flow until the drain becomes ineffective.
- Gravel compacts and loses porosity. The weight of soil above the drain compresses gravel, reducing its ability to hold and move water.
- The outlet clogs or freezes. If the drain outlet (where water exits) gets blocked by debris or ice, water backs up into the trench.
- Roots invade the pipe. Tree and shrub roots seek moisture and can penetrate perforated pipe, especially if the drain sits near established plantings.
Maintenance Schedule for Long-Term Performance
A French drain requires periodic maintenance to stay functional:
Every 2-3 years: Inspect the outlet. Clear any debris, sediment, or vegetation blocking water discharge. If the outlet is clogged, water has nowhere to go and the drain fails.
Every 3-5 years (clay soil) or 5-7 years (sandy soil): Flush the drain. This is the most important step. Use a high-pressure water jet to clear accumulated sediment from inside the perforated pipe. Professional drain cleaning services use specialized equipment for this; DIY flushing with a garden hose rarely works well enough. Expect to pay $300-$800 for professional flushing of a typical residential French drain.
Annually: Check for standing water above the drain. If puddles reappear in the same spot, the drain is clogging and needs flushing sooner than the 3-5 year window.
After heavy rain events: Walk the outlet area. Confirm water is flowing. If the outlet is dry but the drain area is wet, the pipe is blocked.
Cost and Trade-Offs
The cost to install a French drain varies by length and soil conditions. Trenching in clay soil takes longer than sandy soil. Professional installation accounts for proper slope, pipe sizing, and drainage destination. For a typical residential yard (a 50-foot drain), expect $1,500-$3,500 for professional installation. DIY installation costs $300-$800 in materials but requires equipment rental (trencher: $50-$100/day) and significant labor.
The real cost is maintenance. If you skip flushing, the drain clogs within 3-7 years and becomes useless. Reflushing costs $300-$800 each time. Over 20 years, you’ll spend $1,200-$3,200 on maintenance alone. Budget for this before committing to a French drain.
A French drain works because it intercepts water before it pools. The perforated pipe collects water from the surrounding soil and moves it away through gravity and the slope you created. But only if you maintain it. Neglected French drains are expensive yard decorations.
Step 4: Extend Downspouts Away From Your Foundation
Your gutters collect roof water and funnel it downward. Without proper downspout extensions, all that water dumps near your foundation.
Measure your downspouts. Standard extensions should discharge water at least four to six feet away from your house. In heavy rain areas, ten feet is better.
Add extensions to every downspout. Rigid extensions attach directly to the downspout. Flexible extensions (splash blocks or flex pipes) work too but are less reliable in heavy rain.
Direct the water toward your drainage system. If you’ve installed a French drain, run downspout extensions toward it. If you’ve created a rain garden or swale, aim the water there. Never let downspouts dump water in the same spot repeatedly.
Clean gutters twice a year. Clogged gutters cause water to overflow, defeating your extensions. This simple maintenance prevents many drainage problems.
Downspout extensions are cheap and easy to install yourself.
Step 5: Core Aerate and Add Organic Matter to Improve Soil
Compacted soil repels water instead of absorbing it. This forces water to pool on the surface. Core aeration breaks up compaction and improves soil structure.
Step 6: Create a Swale or Rain Garden for Surface Drainage
A swale is a shallow, planted channel that directs water away from problem areas. A rain garden is a planted depression that captures water and lets it infiltrate slowly.
Frequently Asked Questions
How much does it cost to fix backyard drainage?
Drainage repair costs depend on the solution you choose and the size of your yard. Simple fixes like extending downspouts cost less than installing a French drain or regrading your property. Get a custom quote from a professional to understand pricing for your specific situation.
What are the signs of poor yard drainage?
Standing water that lingers after rain, soggy patches that stay wet for days, foundation cracks or dampness, eroded soil, and dead or diseased plants in wet areas are all signs of poor drainage. If your lawn feels spongy underfoot or mosquitoes breed in your yard, drainage problems are likely present.
Is standing water in a yard a health hazard?
Yes. Standing water attracts mosquitoes that carry diseases, creates conditions for mold and mildew growth, and can harbor bacteria. It also weakens your foundation, damages plant roots, and causes erosion. Fixing drainage protects your family’s health and your property’s structural integrity.
Can I fix backyard drainage myself, or do I need a professional?
Simple solutions like extending downspouts and adding organic matter are DIY-friendly. However, installing a French drain, regrading large areas, or diagnosing complex drainage issues requires professional expertise, equipment, and knowledge of local grading codes. A professional assessment ensures the fix works long-term.